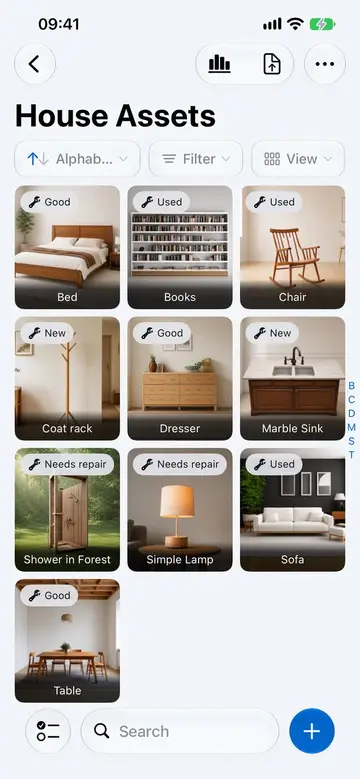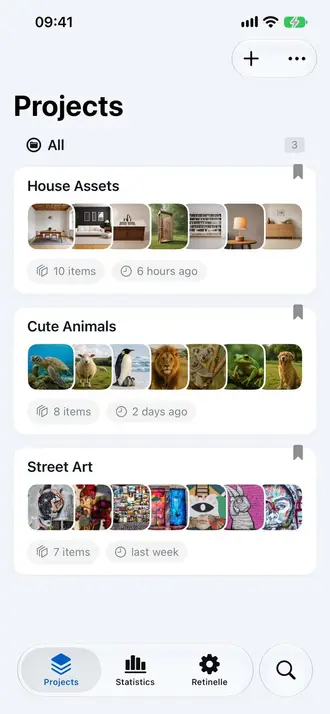
A disorganized inventory is almost as useful as no inventory at all. If you cannot find the item you recorded three months ago, the recording was wasted time. Retinelle solves this with projects: separate containers that let you group items by whatever logic makes sense for your situation.
Why projects matter
Most people do not have one inventory. They have several, running in parallel. A homeowner might track household belongings in one project and a storage unit in another. A property manager keeps one project per rental unit. A costume designer separates projects by production. A family moving houses tracks packed boxes by room.
Retinelle does not force a single structure on you. You create as many projects as you need, name them however you want, and organize items within each one independently.
How to organize by project
-
Create a project. Give it a clear name that tells you what is inside: “Living room”, “Apartment 3B”, “Summer move”, “Client: Martinez wedding”. The name is for you, so make it recognizable at a glance.
-
Add items to the project. Each project holds its own set of items with their own photos and custom fields. An item in “Garage” does not appear in “Kitchen” unless you move it.
-
Switch between projects as needed. Your project list shows all your inventories in one place. Tap into any project to see its items, add new ones, or export a document.
What to put in separate projects
There is no single right answer, but here are patterns that work well:
- By room. One project per room in your home. Useful for insurance inventories where an adjuster might ask “what was in the bedroom?”
- By location. Separate your primary home from a vacation property, storage unit, or office.
- By event. A move, a renovation, an estate sale. Temporary projects that serve a specific purpose.
- By client or job site. If you document items for work, one project per client or location keeps records clean.
- By collection. A stamp collection, a wine cellar, a costume wardrobe. Each gets its own space.
Keeping projects manageable
If a project grows past a few hundred items, consider splitting it. “House” might become “House - Downstairs” and “House - Upstairs”. The goal is to keep each project small enough that you can browse it without feeling lost.
You can also use custom fields and filters within a project to create virtual groupings without splitting into separate projects. For example, a single “Electronics” project might use a “Room” custom field to tag items by their location in the house.
Related features
- Search and Filter Your Inventory to find items across or within projects
- Add Custom Fields to Your Inventory for structured tagging
- All features
Feature in practice